

How To Draw Feet How To Draw Feet Side View
Feet and hands are likely the two about avoided body parts by beginning artists. Certain, any bit of human anatomy presents a set of challenges, but easily and anxiety are considered past some to be the "hardest to draw".
Some folks will even go to bully lengths to avoid drawing feet. They may purposely get out them out of a drawing or cover them upwards with overgrown grass blades.
Only drawing feet is merely like drawing any other subject. We only need to observe the feet and look for basic shapes and forms to depict. When we find them and draw them showtime, the contour lines are much easier to describe. With a bit of value and tone, the texture and form of the feet tin be adult.
The following video explains a uncomplicated approach to drawing feet. This approach uses three basic forms that anyone can draw. When these three forms are recognized and pieced together, the procedure becomes much easier.
Don't Over Think Drawing Feet
The human body is a complex subject. The os structure and muscles underneath the skin play a function in the subtle changes of tone that affect the representational qualities of the cartoon. Knowing the anatomical structure certainly helps, but it's non required knowledge to draw a convincing human foot.
We can simplify the process past recognized three basic forms. These bones forms can be found on whatsoever human foot in just nigh any position. If we practice recognizing these forms and drawing them, then drawing feet actually becomes a much easier endeavor.
The Wedge
The showtime basic form is perhaps the easiest to recognize. It is the wedge that exists in the heart portion of the foot. Typically, this is the first form that is drawn since the other ii forms extend off from information technology. This wedge course makes up the majority of the foot and information technology helps to make up one's mind the bending and direction of the rest of the foot.
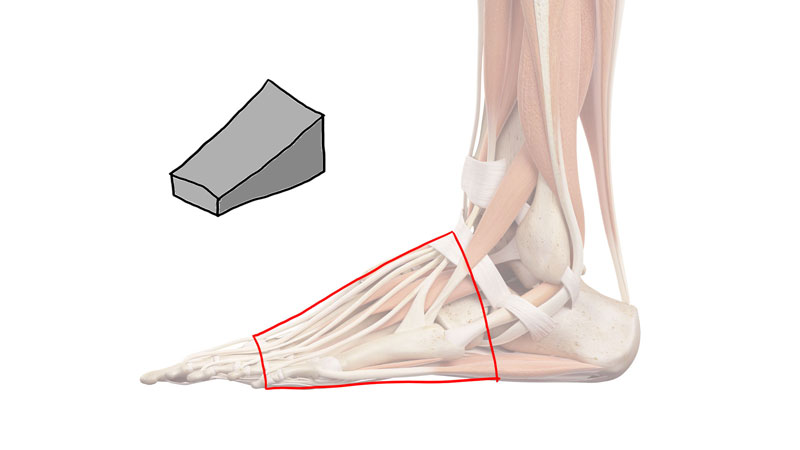
This wedge is taller towards the heel and slants downwardly toward the toes. When drawing these bones forms, yous can exist loose with the lines that you draw. Nosotros'll refine the edges and the contours once nosotros take all of the basic forms in place.
The Toes
The second form is fatigued in the location of the toes. This form connects with the end of the wedge and resembles a flattened, partial cylinder. If the toes are viewed from the front or straight from the side, this form may appear as a simple rectangle.
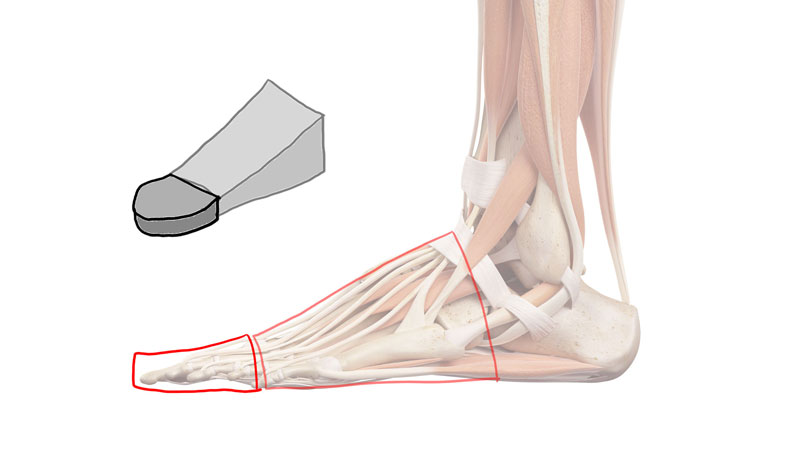
You may think of this form as the end of a shoe, which makes perfect sense. Recollect, at this stage of the cartoon, nosotros are only concerned with these simple forms. Exist sure that your aren't distracted by the details. We'll add together the details after these forms are in identify.
The Heel
The tertiary class is for the heel of the foot. This forms extends from the opposite terminate of the wedge. Information technology is a much taller partial cylinder that is flattened on the sides.
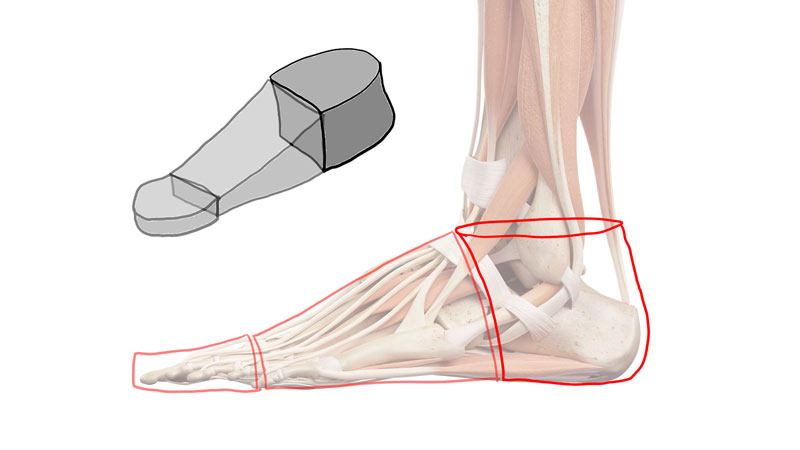
Once nosotros have the basic forms in place, we tin side by side plow our attention to defining the profile lines or outlines. If nosotros started with the contours, so we are more likely to encounter issues with accuracy.
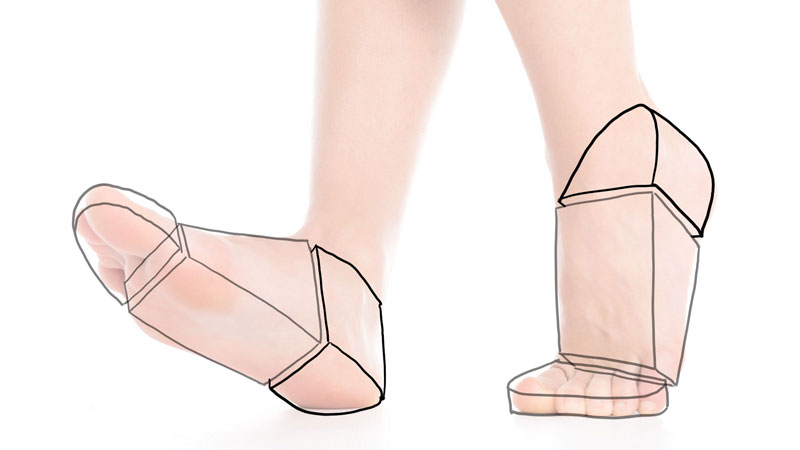
Basic Forms From Whatsoever Angle
These three basic forms can be recognized and fatigued when the foot is in whatsoever position. The forms may change slightly depending on the specific angle, but they are still easy to detect.
Drawing The Contours
The profile lines or outlines define the edges of the feet. These lines can be fatigued with added confidence because we now accept the overall class of the pes in place. We can pay closer attending to the subtle curves and bumps that occur.
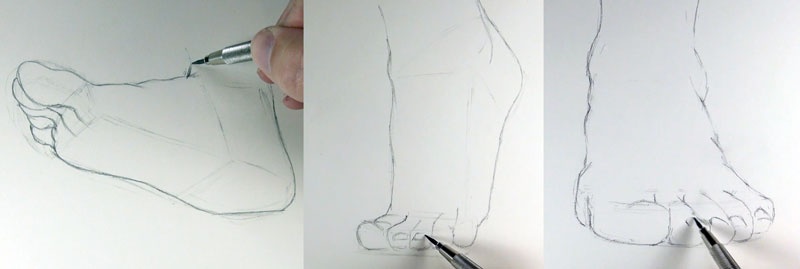
The toes fit nicely in the form that we accept drawn for them. The line where the wedge meets the course tin also exist used every bit a guideline for where the toes encounter the centre portion of the foot. In most circumstances, this line curves slightly. The second toe ordinarily extends out the most. The toes and then become shorter making their way back to the wedge.
Developing the Form of the Pes
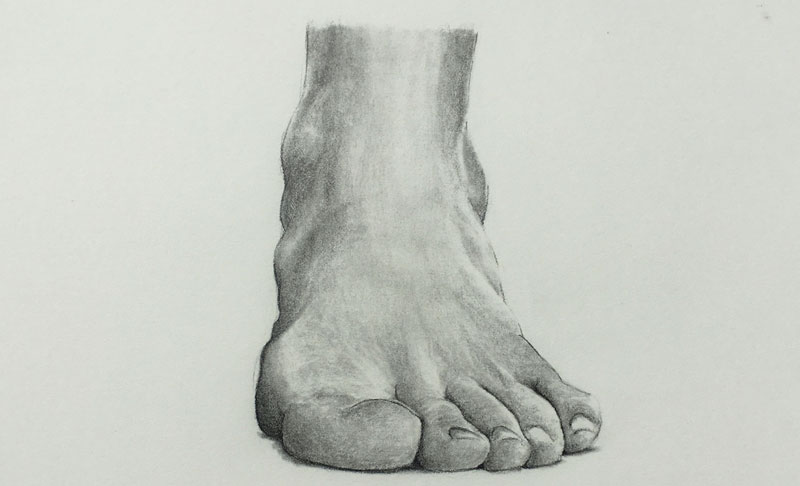
The illusion of form is created through the development of a range of value. Nosotros ofttimes refer to this part of the procedure as shading. We aren't merely because the shades though, but likewise the lighter values. The positioning of these tones creates the illusion of the light source, which informs the viewer of the form.
In each one of these examples, nosotros are faced with dual light sources. (In nigh circumstances, at that place is more than one calorie-free source.) We have a dominant light source that originates from the right and a weaker i that originates from the left. This produces stronger highlights on the correct side and stronger shadows on the left.
We tin also consider that in most situations, areas that recede abroad from the viewer are typically darker in value, while locations that protrude towards the viewer choice up more calorie-free and are lighter in value. This ways that even on the side of the foot that is closest to the dominant light source, we find some areas of darker tone.
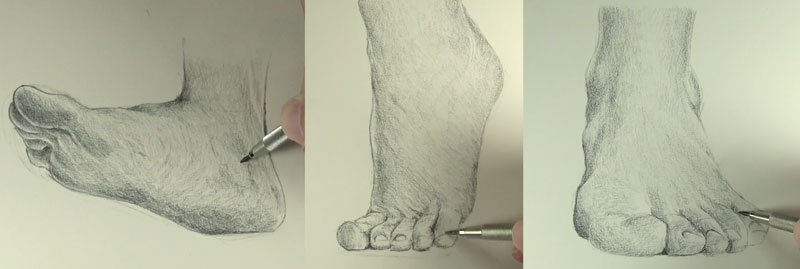
As the graphite is applied to the drawing with a pencil, we'll need to consider the grade of the pes. Directional strokes should menstruum around the surface in a manner that mimics the form. These directional strokes are not unlike cantankerous profile lines. By adding the graphite in this way, we are addressing not only the tonality, but besides the class.
Developing Texture
The texture of the foot is adult by smoothing transitions of tone and value with the utilize of a blending stump. The directional strokes made with the blending stump should mimic those made with the pencil. As the form changes, the stroke should too.
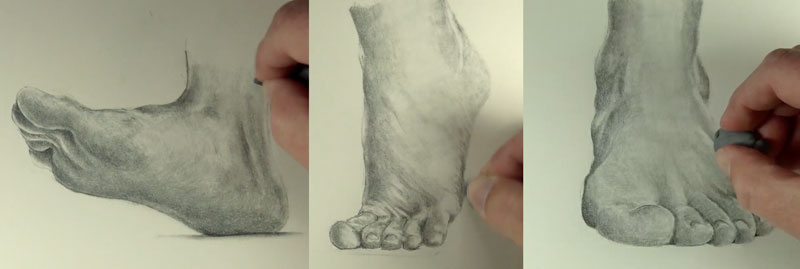
Lighter values and highlights can exist pulled or lifted from the surface with a kneaded eraser. The combination of smoothing graphite applications and removing $.25 of highlight with the kneaded eraser often leads to a convincing illusion of skin.
Strengthening The Contour Lines
After the tones and texture have been addressed, we can strengthen the contrast and refine the edges with a sharpened graphite pencil. Effectually the edges, only the areas of darker value are reinforced with boosted lines.
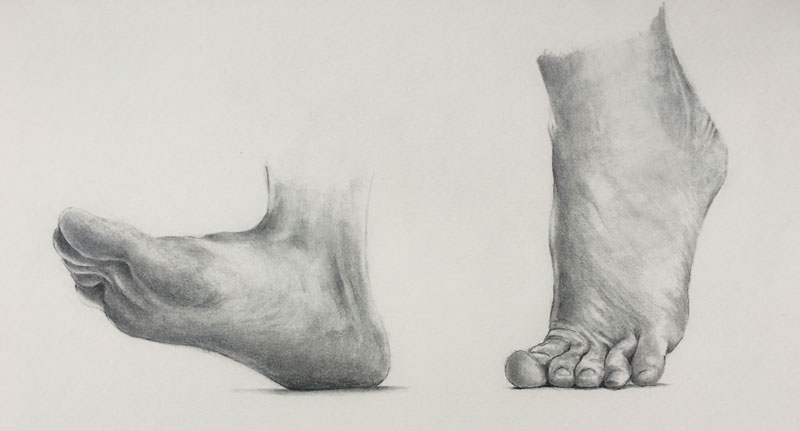
Edges of the foot that are highlighted are left open up with implied lines defining the edge. These terminal few lines complete the drawing.
Summing It Up
Drawing feet doesn't have to be difficult. Nosotros can remove many of the complexities by simply learning to recognize the bones forms that are present. By drawing these forms loosely in the beginning stages of the drawing, we are free to focus on the contour lines with conviction. With the contour lines in place, all that's left to practice is add a bit of value and texture.

Source: https://thevirtualinstructor.com/how-to-draw-feet.html
Posted by: francisviode1952.blogspot.com
0 Response to "How To Draw Feet How To Draw Feet Side View"
Post a Comment