

How To Create An Email System
Oct 13, 2021
Scott H.
11min Read
How to Create a Professional Email Account and Set Up a Mail Client

Emails have become an essential part of online communication and marketing. Hence, it's no wonder email marketing has also become one of the most effective strategies to drive sales for your business.
Many businesses still use emails to communicate with their partners and potential customers, so having a custom email address can be immensely helpful.
A professional email address refers to a business email account with your business name on it, for example, john@mybusiness.com instead of john@outlook.com. In other words, it creates credibility at first glance to your target audience and advertises your brand.
This tutorial will show you how to create an email address that promotes your business and builds trust. In addition, you will find instructions on how to set up email clients to manage emails efficiently and helpful tips for a successful email marketing campaign.
1. Register a Domain Name

The first step of creating a professional email address is to register a domain name. Your registered domain name will appear after the "@" symbol on the email address – for example, johnsmith@yourdomain.com.
Hostinger's domain checker helps you find unique domains for your website and business email accounts. We also provide domain registration starting from as low as $0.99/year or even completely free when bundled with our hosting plans!
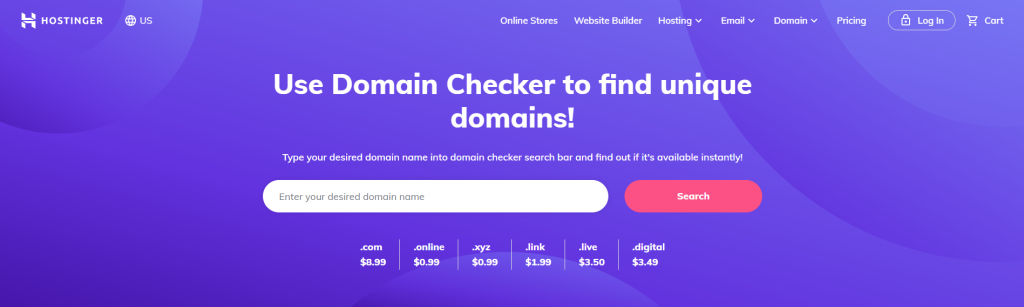
Enter the domain name you want and click on the Search button. The system will present a list of available domains to choose from. If you don't like any of the options, get creative with a domain name generator.
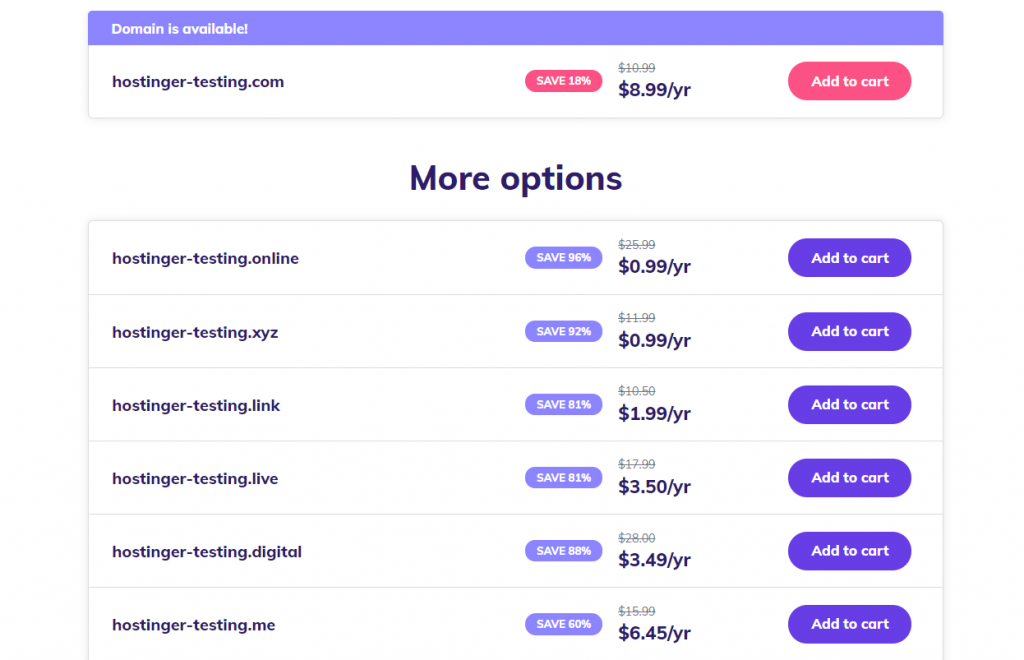
Choose the domain name you want and click Add To Cart. It will take you to a registration page. In addition to buying a domain, you can also purchase a web hosting plan starting from only $1.39/month.
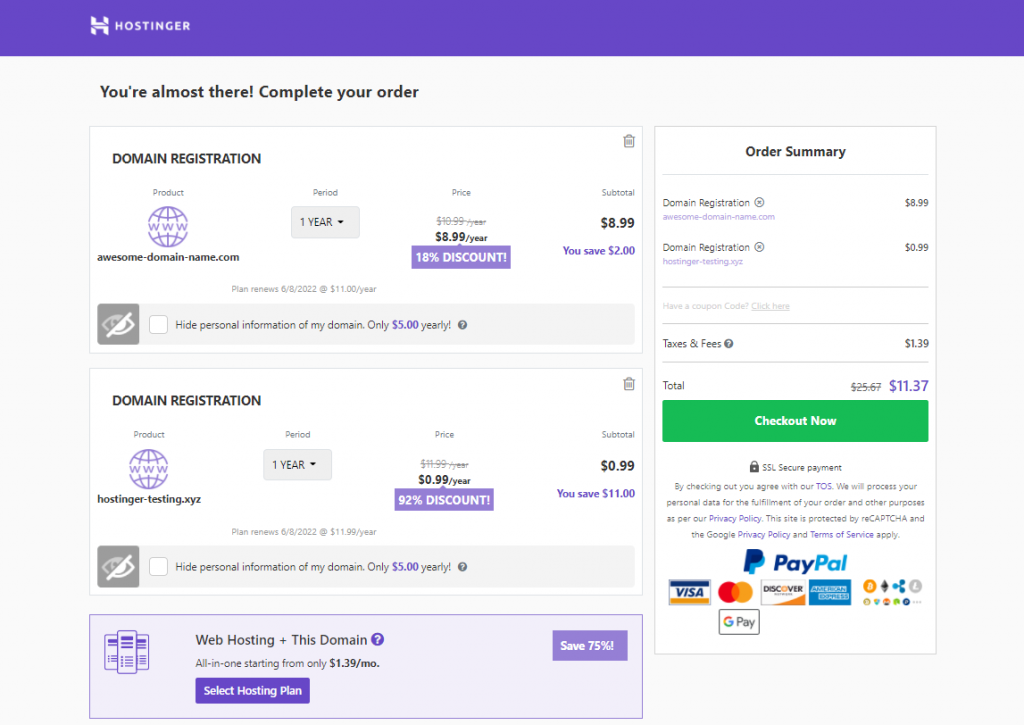
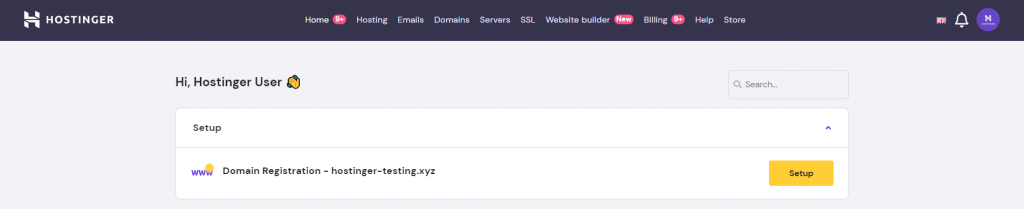
If you only need a new domain name, simply click the Checkout Now button and proceed to payment. Upon completing the payment process, you will be directed to the Hostinger control panel. From there, click Setup.
The next screen will present multiple forms to fill out. This step is important as your information will be stored in the WHOIS database.

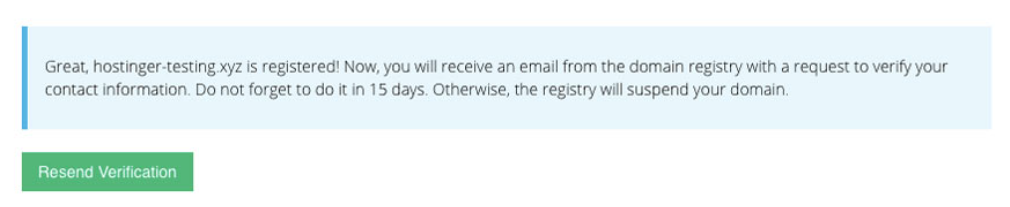
After filling out your contact details, check your registered email address to verify your domain name. Don't forget to verify your domain within 15 days, as delaying it will result in a temporary suspension.
If you have bought a domain name from a domain registrar, all you need to do is add it to your hosting account and point the DNS to our servers. Alternatively, it's also possible to transfer the domain name to Hostinger.
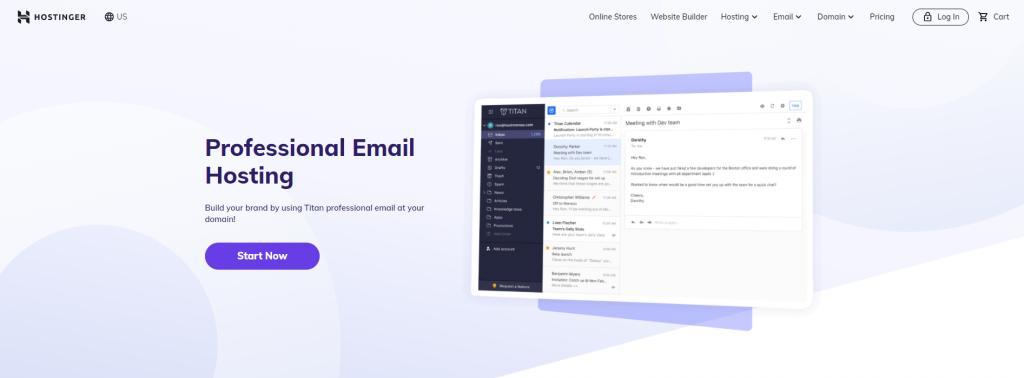
2. Choose an Email Hosting Provider

Now that the domain name is ready, pick an email host – a hosting company that operates and provides email servers for users. Email hosting providers store, send and receive emails on their servers for their users.
Hostinger offers email hosting services starting from $0.99/month. With these services, users get dedicated resources to create and manage professional email accounts.
There are two email hosting plans available:
- Business Email – $0.99/month. An email sending solution equipped with tools such as reminders and collaboration to reach email marketing goals. This plan includes 10 GB of email storage, 50 email aliases, antivirus checks, multi-device support, and advanced anti-spam software.
- Enterprise Email – $2.49/month. A more advanced solution for bigger businesses to build professional brands and grow email marketing. This hosting plan has all features of the business email plan along with 30 GB of email storage, 50 email aliases, and unlimited email filters.
Each email hosting service also offers a one-click import feature for migrating your old email hosting account to Hostinger easily.
Moreover, Hostinger also offers a dedicated plan for users who want to create business email accounts using Google Workspace.

Many companies or businesses use the Google Workspace plan to collaborate easily with their teams. Google Workspace email service by Hostinger costs $6.00/month.
It comes with 30 GB of email storage, 30 email aliases, and unlimited mail filters. The plan also provides advanced phishing and malware protection to keep your email accounts secure.
On the other hand, if you only need email hosting for marketing purposes, we recommend our Enterprise Email plan. However, don't worry if you also plan to host a site since our web hosting plans include domain-based email addresses.
3. Set Up the Email Services

Depending on which email service you choose, the steps to set it up and create an email account may slightly differ. In the next following sections, we will explain how to get started with your email service plan.
Hostinger Email
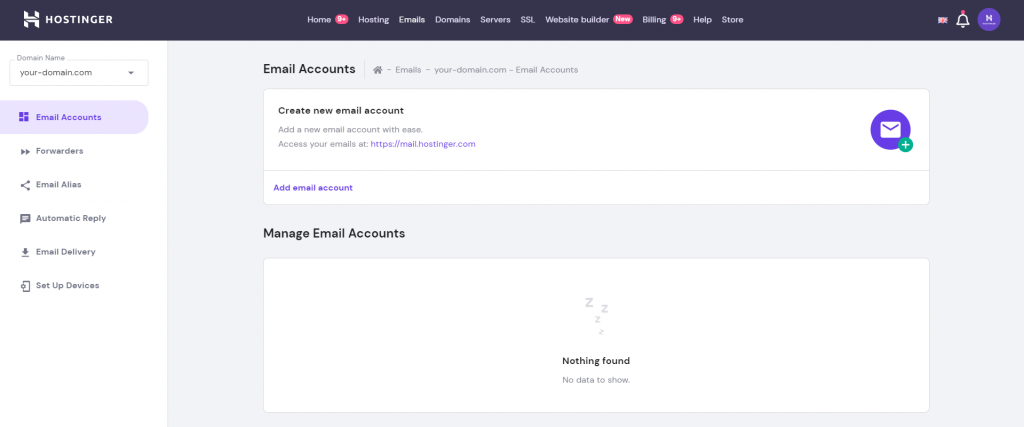
To create and add a new email address, go to Emails -> Email Accounts. From there, click Add new email account.
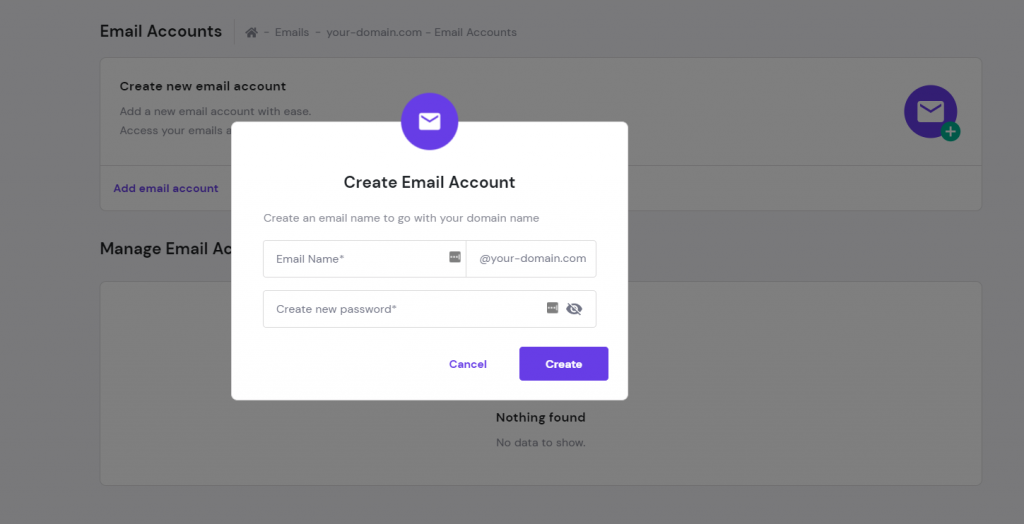
Fill out the username and password and click the Create button. Once your new email address is created, it should appear under the Manage Email Accounts section.
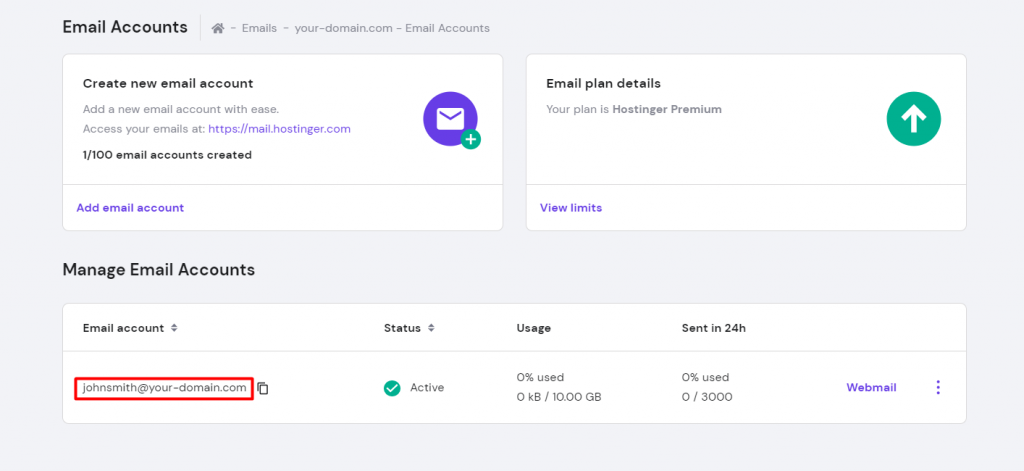
Repeat the same steps to add another professional email address.
Premium Email Solutions
Apart from Hostinger email, we offer three different business email solutions. If you're not planning to host a site, these tools are a perfect choice – they are functional email services even without a web hosting account.
Business and Enterprise Email Services
As soon as you purchase this plan, you'll find a setup wizard in your hPanel dashboard.
The next screen will require you to enter your domain name and change your DNS settings. If your domain is pointed to Hostinger, everything will be done automatically. Once you have completed the settings, you will be redirected to a management page.
There, you'll be able to create a business email account and access your Webmail.
Google Workspace
If you purchase a Google Workspace plan, the setup wizard will appear in your hosting control panel.

If your domain is already pointed to Hostinger, all required MX records will be added automatically. Otherwise, you will need to set up Google MX records manually.
After your order is set up, click Manage to create a Google Workspace account. Include your username and password, and sign in to your Google Workspace admin area.
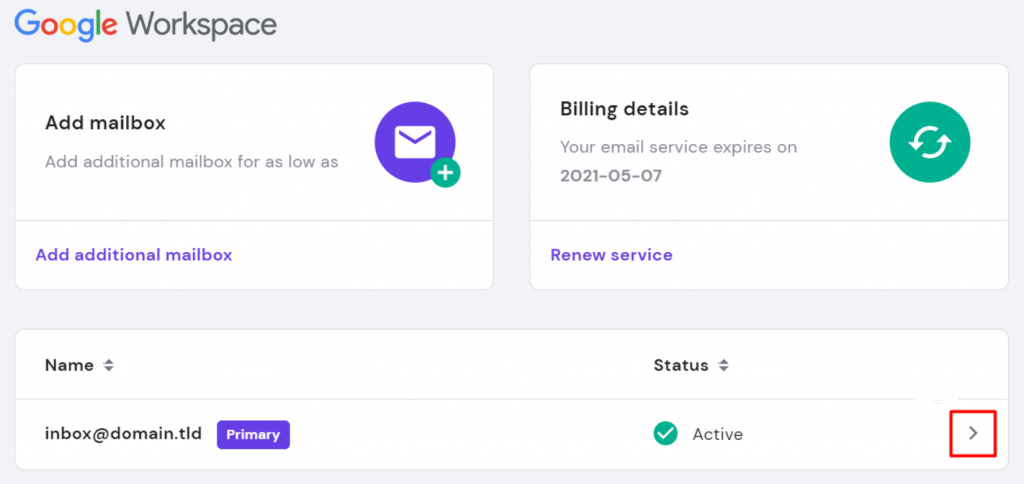
Click the highlighted button on the screenshot above and fill out your account information to set up Google Workspace.
Once the process is complete, a pop-up will appear to verify your domain with Google. Click on it to see your verification code. Then, include the code with a TXT record in your DNS settings.
To do so, access your hPanel dashboard and go to Advanced -> DNS Zone Editor.
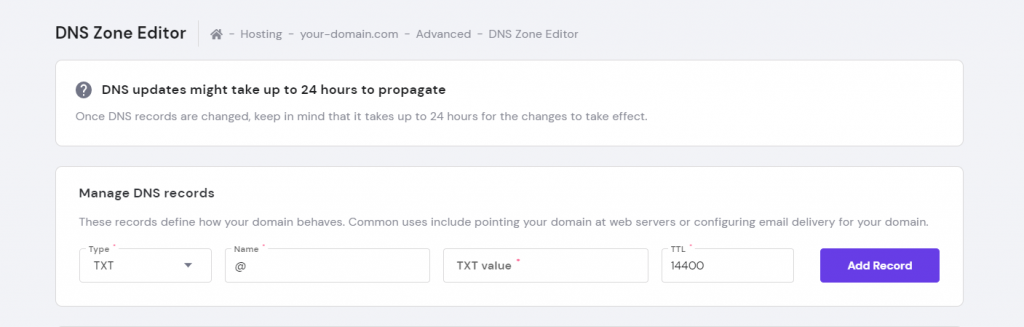
Choose TXT as your DNS record. Next, input your verification code on the TXT value field and click Add Record. If you have trouble with TXT records, this method also works with CNAME records.
Other ways to verify your domain include:
Add a Meta Tag
Keep in mind that this alternate method works only if you already have a site. First, access your Google Admin Console.
In the admin console, click Domains -> Manage domains. From there, choose the Add a domain option. Next, enter your domain name, and click Continue and Verify Domain Ownership.
The next page will present you with two options to verify your domain name. Choose Alternate methods and copy the provided meta tag.
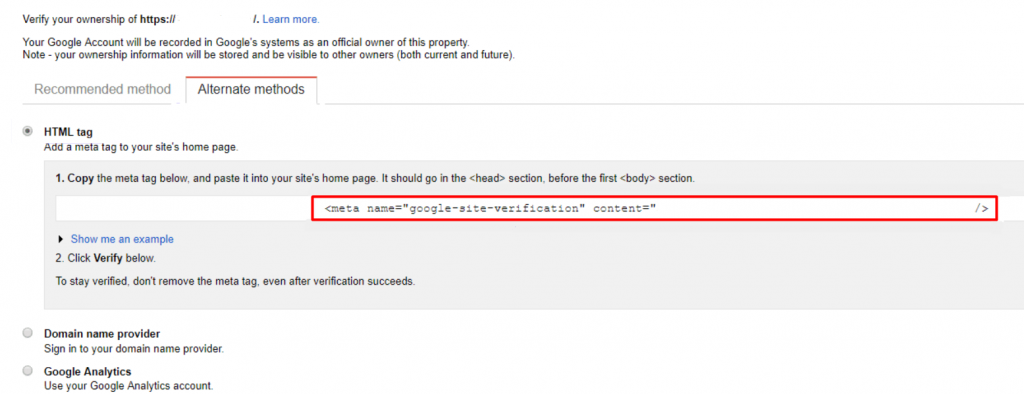
The next step is to paste your meta tag into your site's index.html file. Make sure to paste the code after the <head> section and before the first </body> tag.
The code should look something like this example:
<html> <head> <title>Your Page Title</title> <meta name="google-site-verification" content="your verification string"> </head> <body>
Upload an HTML File
For users who already have websites, there is another method similar to the previous one. Instead of choosing an alternate method, click on the Recommended method option.
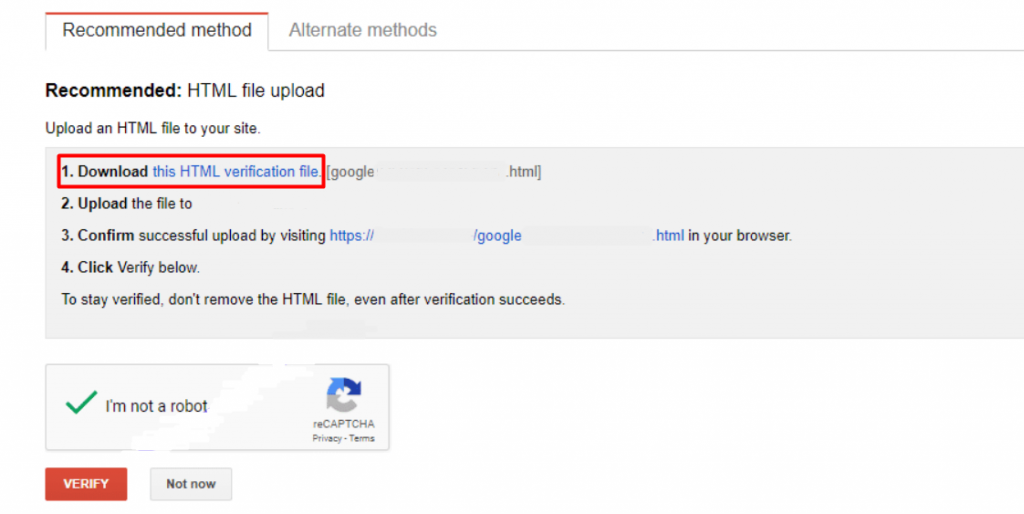
Click on the link to start downloading the HTML file to your computer. Once the download is complete, you can upload the file to your website via an FTP client or your hosting admin panel.
Next, proceed to access the file by entering its directory path on a web browser – for example, your-site-domain.com/thefilename.html. If you see the google-site-verification text on your screen, then all you need to do is go back to your Google admin console and click the Verify button.
As soon as you complete all the instructions, you will have access to create a business email account, add new users, and perform various management tasks.
4. Configure the Email Addresses

Once you have set up your business email services and added new users, configure each email address to make it look more professional. Since personalization is a part of successful campaigns, you'll need a personalized business email account. Do so by including a full name followed by your business name.
It's also important to create multiple general-purpose mailboxes, such as contact@business-name.com or support@business-name.com. These mailboxes receive and keep track of inquiries from customers.
Next step is to create an email signature – an automated block of text that appears at the end of an email message. Such email signatures add your company information and increase your brand awareness.
Hostinger users can access Webmail to create a business email signature – simply log in with your email username and password. Then, the next step is to click the dashboard screen and navigate to Settings -> Identities.
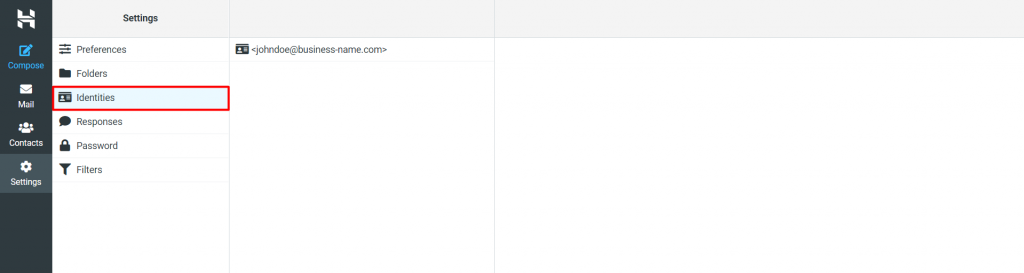
Clicking on it will reveal a list of active email accounts. Continue by clicking on the business email account you want to customize.
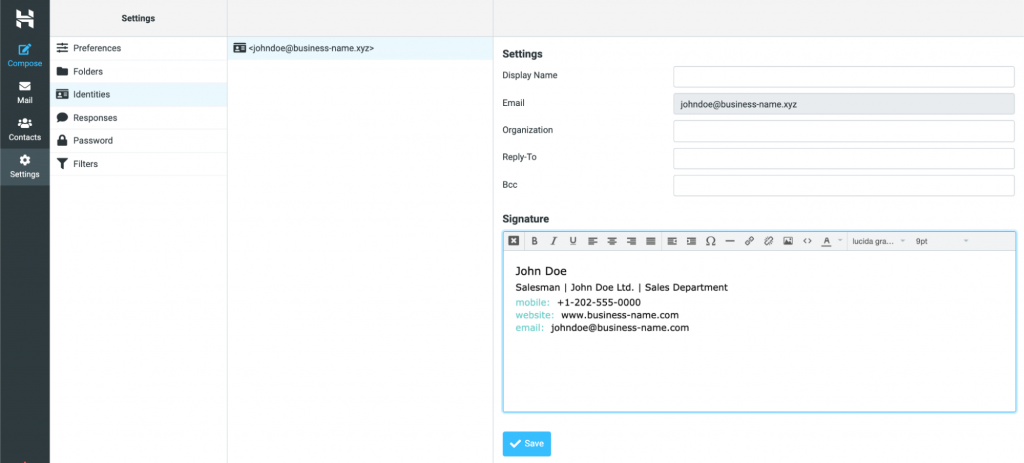
Start composing your email signature in the Signature field as you would on a word processor. Once you're happy with the result, click Save. Now your signature should appear at the bottom of every email you send.
You can use several free tools to easily create professional email signatures, such as Designhill Email Signature Generator, MySignature, Mail-Signatures, and HubSpot.
Some tools provide pre-made templates, while others come with drag-and-drop functionality to customize a design.
5. Set Up an Email Client

An email client is a program or application that sends and receives emails directly from across devices, including a desktop and mobile phone. It works hand-in-hand with an email server. For this reason, the definitions of the two components often overlap.
Email servers are software running on servers that store all emails from the web. They can belong to a hosting company, an internet service provider, or a webmail provider. Meanwhile, email clients function to connect users with email servers.
The main reason for using an email client is to make your work more efficient by managing multiple email accounts in one place. Email clients also usually provide integrations with various apps, such as Google Calendar and Dropbox, to boost your productivity.
To set up an email client, users can download a free email application, such as Mozilla Thunderbird and Mac Mail. We'll give you step-by-step instructions on how to configure each software as an email client below.
Locating IMAP/POP3 and SMTP Server Settings
Before configuring an email client, we need to locate IMAP/POP3 and SMTP server settings. These are email protocols that email clients use to fetch messages from email servers.
To do so, access your hosting control panel. However, remember that based on your email service, the configuration will differ. Here's a quick rundown on where to find the settings that you need.
Hostinger Business and Enterprise Email
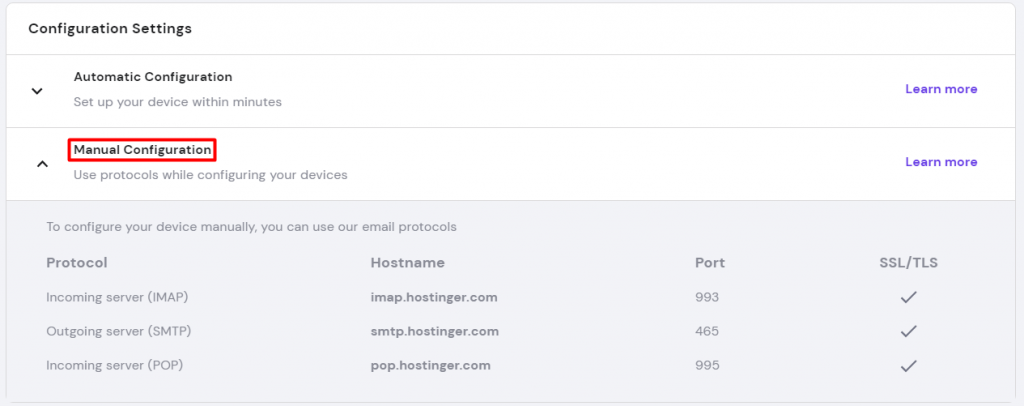
Navigate to Email -> Email Accounts and click your domain name. On the following screen, choose the Set Up Devices option.
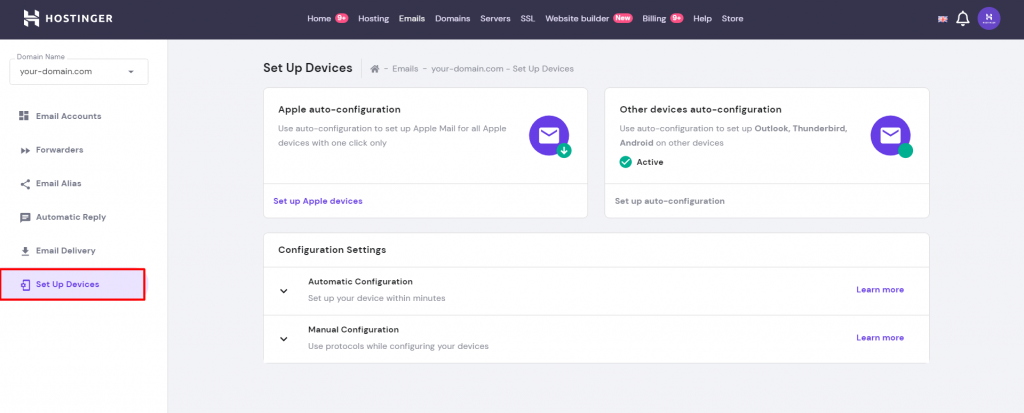
On the Configuration Settings section, click Manual Configuration. There, you will find a table with all the mail server settings.
Google Workspace
Sign in to your Gmail account and click on the gear icon on the upper-right side of your screen. Click Settings and locate the Forwarding and POP/IMAP tab. Make sure to enable IMAP access by clicking on the bullet point and save the changes.
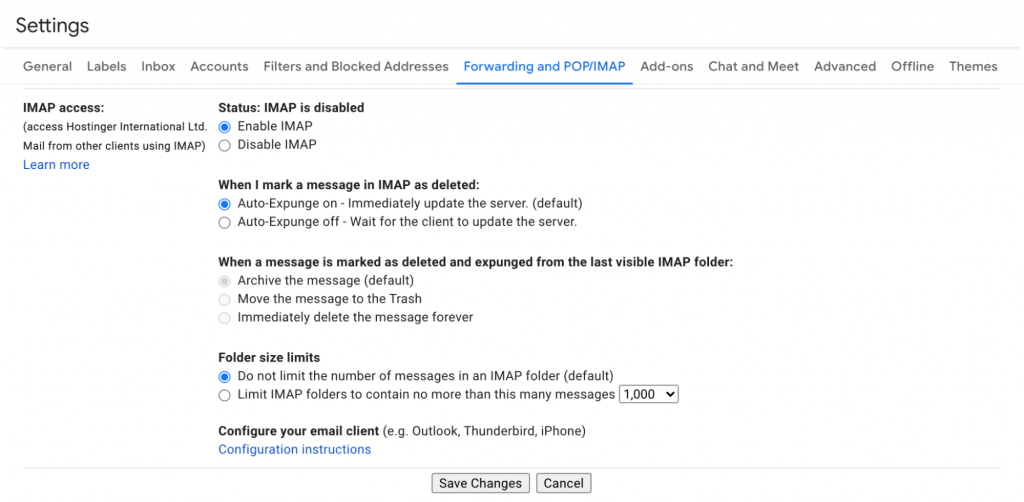
For more details, consider checking the official Google IMAP setup guide.
Adding a Mailbox to the Email Client
Once you've got all the incoming and outgoing mail server details, add them to your email client. Here's how the process will look like in Thunderbird and Mac Mail.
Thunderbird
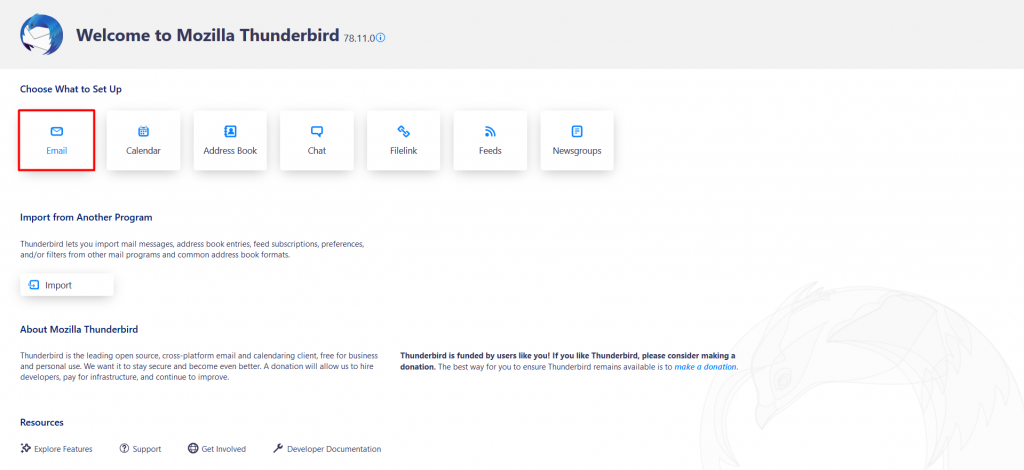
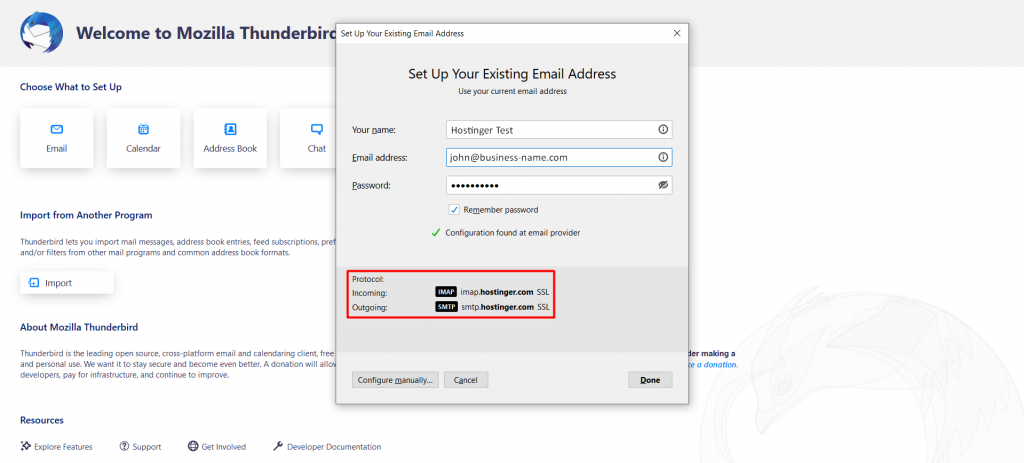
Access the Mozilla Thunderbird client or download the program if you haven't already. Start by clicking on the Email button.
Enter your full name, current email address, password and click Continue.
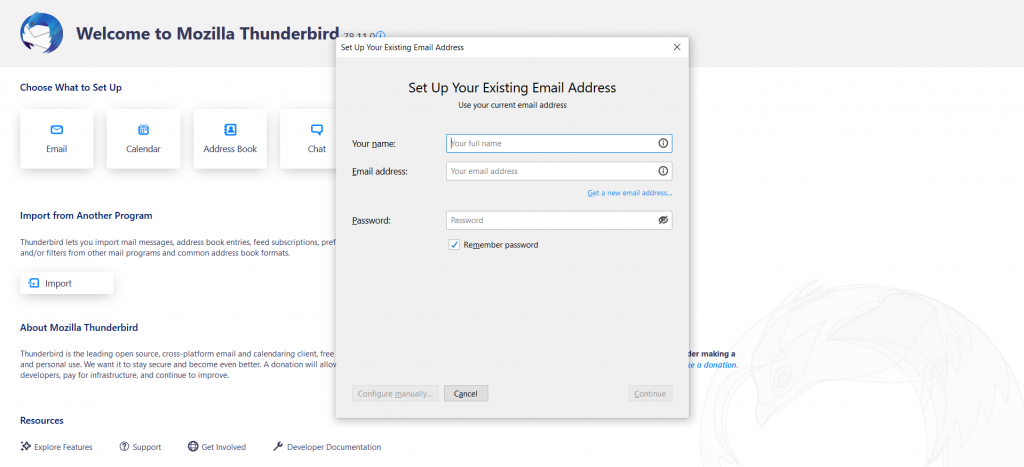
Thunderbird will determine your account settings based on your domain name.
If the system cannot find your account settings, click on the Manual Configuration to edit your server names and enter the IMAP/POP3 ports that were located earlier. Then, click on the Done button.
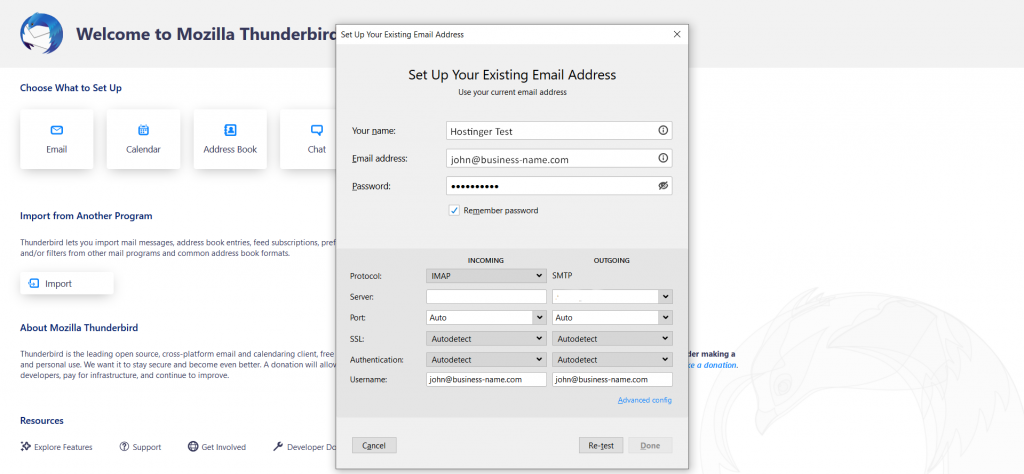
That's it – you can now send emails and manage everything directly from your Mozilla Thunderbird client.
Mac Mail
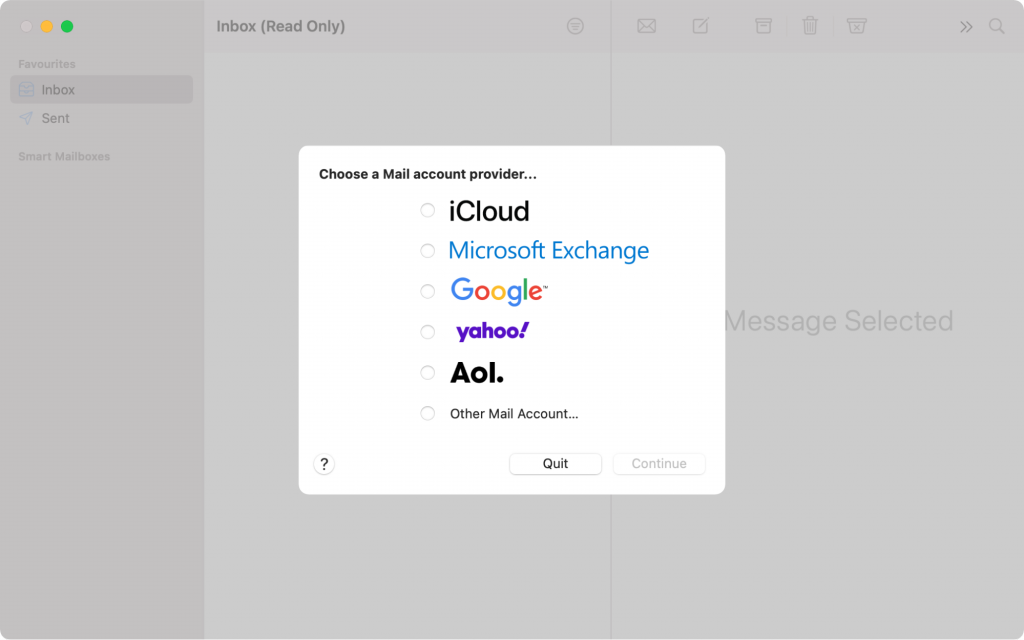
Note that Mac Mail or Apple Mail is only available on Mac OS 10.0 or later. With that in mind, access your Mac Mail client and navigate to Mail -> Add Account. Then, click on Other Mail Account.
A pop-up screen will appear, select your email account provider, and click Continue.
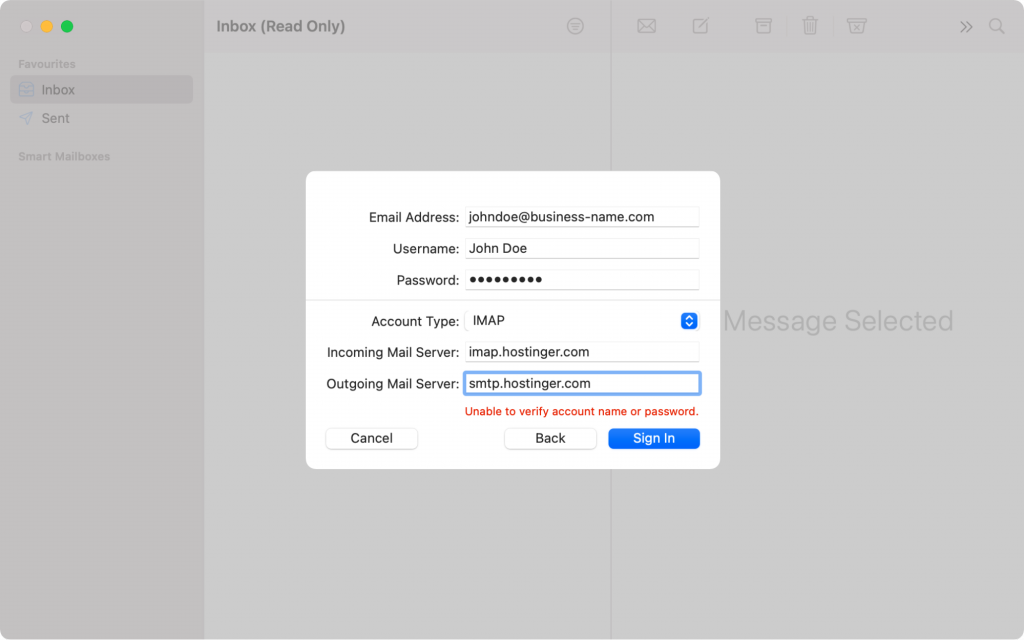
Fill in the necessary details, such as your name, email address, and password. After that, click Sign In.
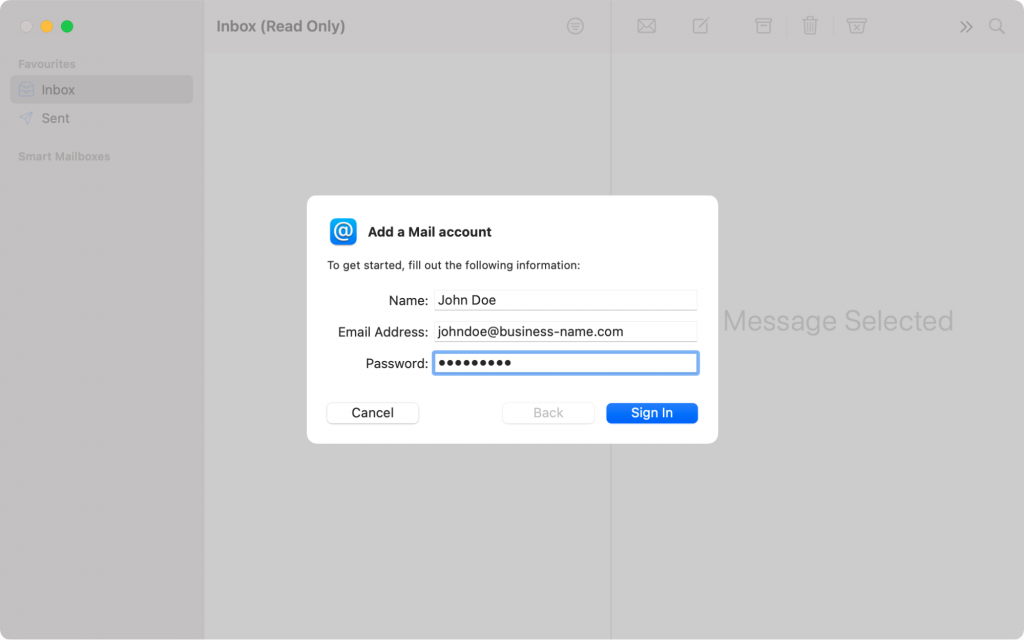
Mac Mail will attempt to connect with your email server automatically. If the system fails to do so, an error message "Unable to verify account name or password" will appear.
However, don't worry – you can manually enter the incoming/outgoing mail server values and ports. Once finished, click the blue Sign In button to finalize the setup.
You can now effectively manage all your mailboxes in a single place. With Mac Mail, you can also include multiple supporting apps from your mobile phone, such as contacts, notes, and calendars.
5 Tips to Get the Best Email Performance and CTR
The main reason why many companies do email marketing is that email campaigns can give an attractive return of investment (ROI) for their businesses. For example, 18% of companies achieve an ROI of more than $70 per $1 invested.
When done correctly, email marketing can raise brand awareness and drive sales. One way to indicate a successful campaign is by examining the open and click-through rates (CTR). These variables determine how your customers or users engage with your emails.
However, preparing good-quality campaigns that engage and sell is not easy. Here are five helpful tips for improving your email performance:
- Work on the subject line. Around 70% of individuals report an email as spam solely by looking at the subject. Thus, it's crucial to create an engaging subject line for every email campaign you send out. Consider using questions or commands in your subject line to catch your audience's attention.
- Personalize your emails. Adding recipients' names in the subject or body of an email can increase open rates up to 20%. In addition to names, you can also include interests or locations as personalization tokens. However, be sure to keep it subtle for privacy reasons.
- Create a CTA. A personalized call to action button generates more CTR than a plain link. Hence, creating a solid CTA is crucial for your email marketing success. Some of the best practices are to include a single CTA and use action-oriented words.
- Be mobile-friendly. Mobile phone users convert 50% better than those who access through web browsers. Thus, it's important to create an email campaign that fits both phone and desktop screens. To do so, write a brief subject line, concise email copy, and use a single column layout.
- Test before you send. Since there are many aspects that you need to get right, send a test email to yourself before launching a campaign. Make sure to check how it looks across devices and fix any error you notice. Litmus, Mail Ninja, and Inbox Analyzer are a few helpful email preview tools.
Do I Need to Own a Website to Create a Professional Email Account?
A professional email account doesn't require a website – a domain can be enough. Simply purchase a domain name from a domain registrar and sign up for an email hosting service. You can then add new users to your domain and manage them under one dashboard.
However, creating a website will bring more advantages for your business. A website helps you establish an online presence and authority. With a website, you can also do more digital marketing strategies and reach a wider audience.
If you already host a website with a hosting provider, like Hostinger, you will usually get free email accounts. In this case, you won't need to use an email hosting service. Instead, simply create a free email account from your hosting admin panel.
Conclusion
Creating a professional email address using your company or business name helps establish credibility. It gives you a different email address instead of a generic email address, like Gmail or Hotmail. This way, you can increase brand awareness and create a professional impression.
Now let's do a quick wrap up of the tutorial:
- Register a domain name. Purchase a domain name from a registrar or buy a hosting plan to create free domain-based emails.
- Choose an email hosting provider. Get dedicated resources and a secure environment to send, receive, and store emails.
- Set up the email services. Activate your email hosting service and start creating business email addresses.
- Configure your email address. Personalize your emails to make them look more professional by using a personal username or name together with a company name. Also, create general mailboxes for receiving inquiries.
- Set up an email client. Install an email client software to manage your business emails from desktops or mobile devices.
Once you have your business email accounts ready, don't wait to start sending or forwarding emails to your audience. Additionally, you can set up an email on your Android phone to easily manage it on the go.
By finishing this guide, you've learned the steps to create a custom email account with your business name – we hope this has been helpful.
Don't hesitate to comment in the section below if you have any questions about the instructions or further suggestions.

Scott is a WordPress developer. He's passionate about all things IT and loves sharing his knowledge with the world. When he's not working, Scott enjoys playing video games and watching true crime documentaries.
How To Create An Email System
Source: https://www.hostinger.com/tutorials/how-to-create-an-email
Posted by: francisviode1952.blogspot.com
0 Response to "How To Create An Email System"
Post a Comment